> ## Documentation Index
> Fetch the complete documentation index at: https://developer.fin.com/llms.txt
> Use this file to discover all available pages before exploring further.
# Creating a virtual account and receiving your first deposit
> How to set up a virtual account for a customer in the Dashboard, share the deposit details, and watch the first payment settle.
A virtual account gives your customer a set of bank details they can receive money into. When someone sends a payment to those details, the money is converted and settled to the blockchain address you choose.
This guide walks through both halves of that flow in the Dashboard: creating the account, then receiving the first deposit into it.
## What do I need before I start?
Virtual accounts belong to a customer, so the customer has to exist and be approved first. Create the customer, submit their documents, and wait for the status to show as approved. Verification is not instant, and you cannot open a virtual account for a customer who is still under review.
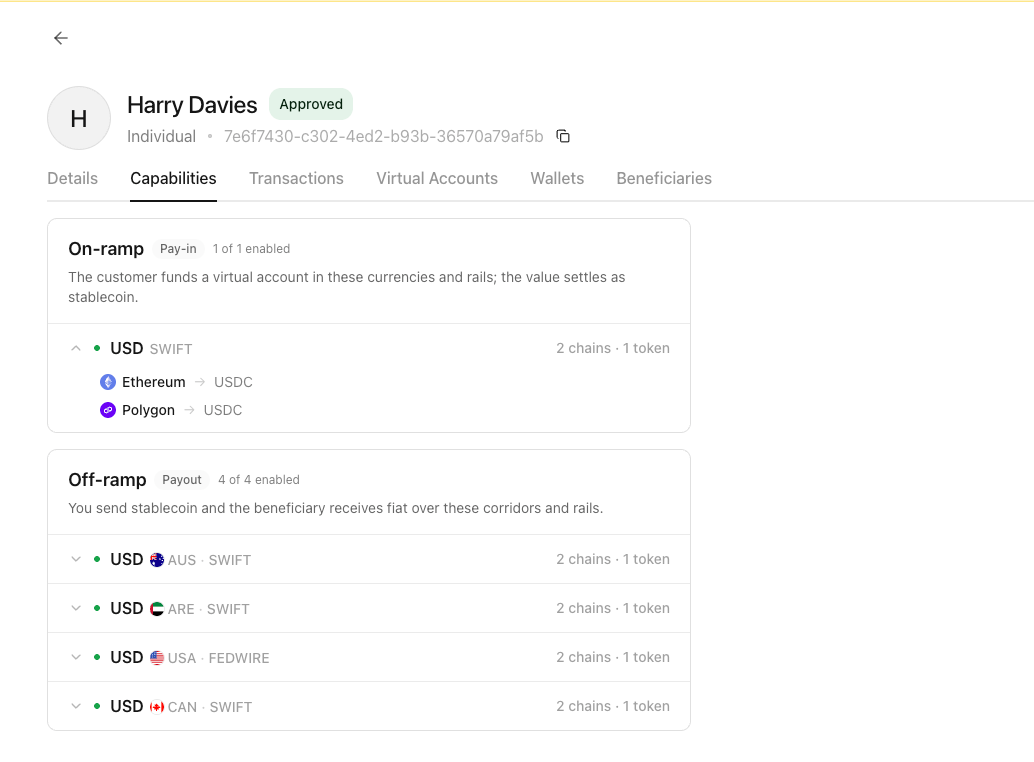
Not every approved customer can hold a virtual account. Check the customer's eligibility in the **Capabilities** tab of the customer before you start, so you do not fill in the form only to be turned down at the end.
 Not sure whether a customer is eligible? Contact us in your dedicated Slack channel and we will confirm.
## How do I create the virtual account?
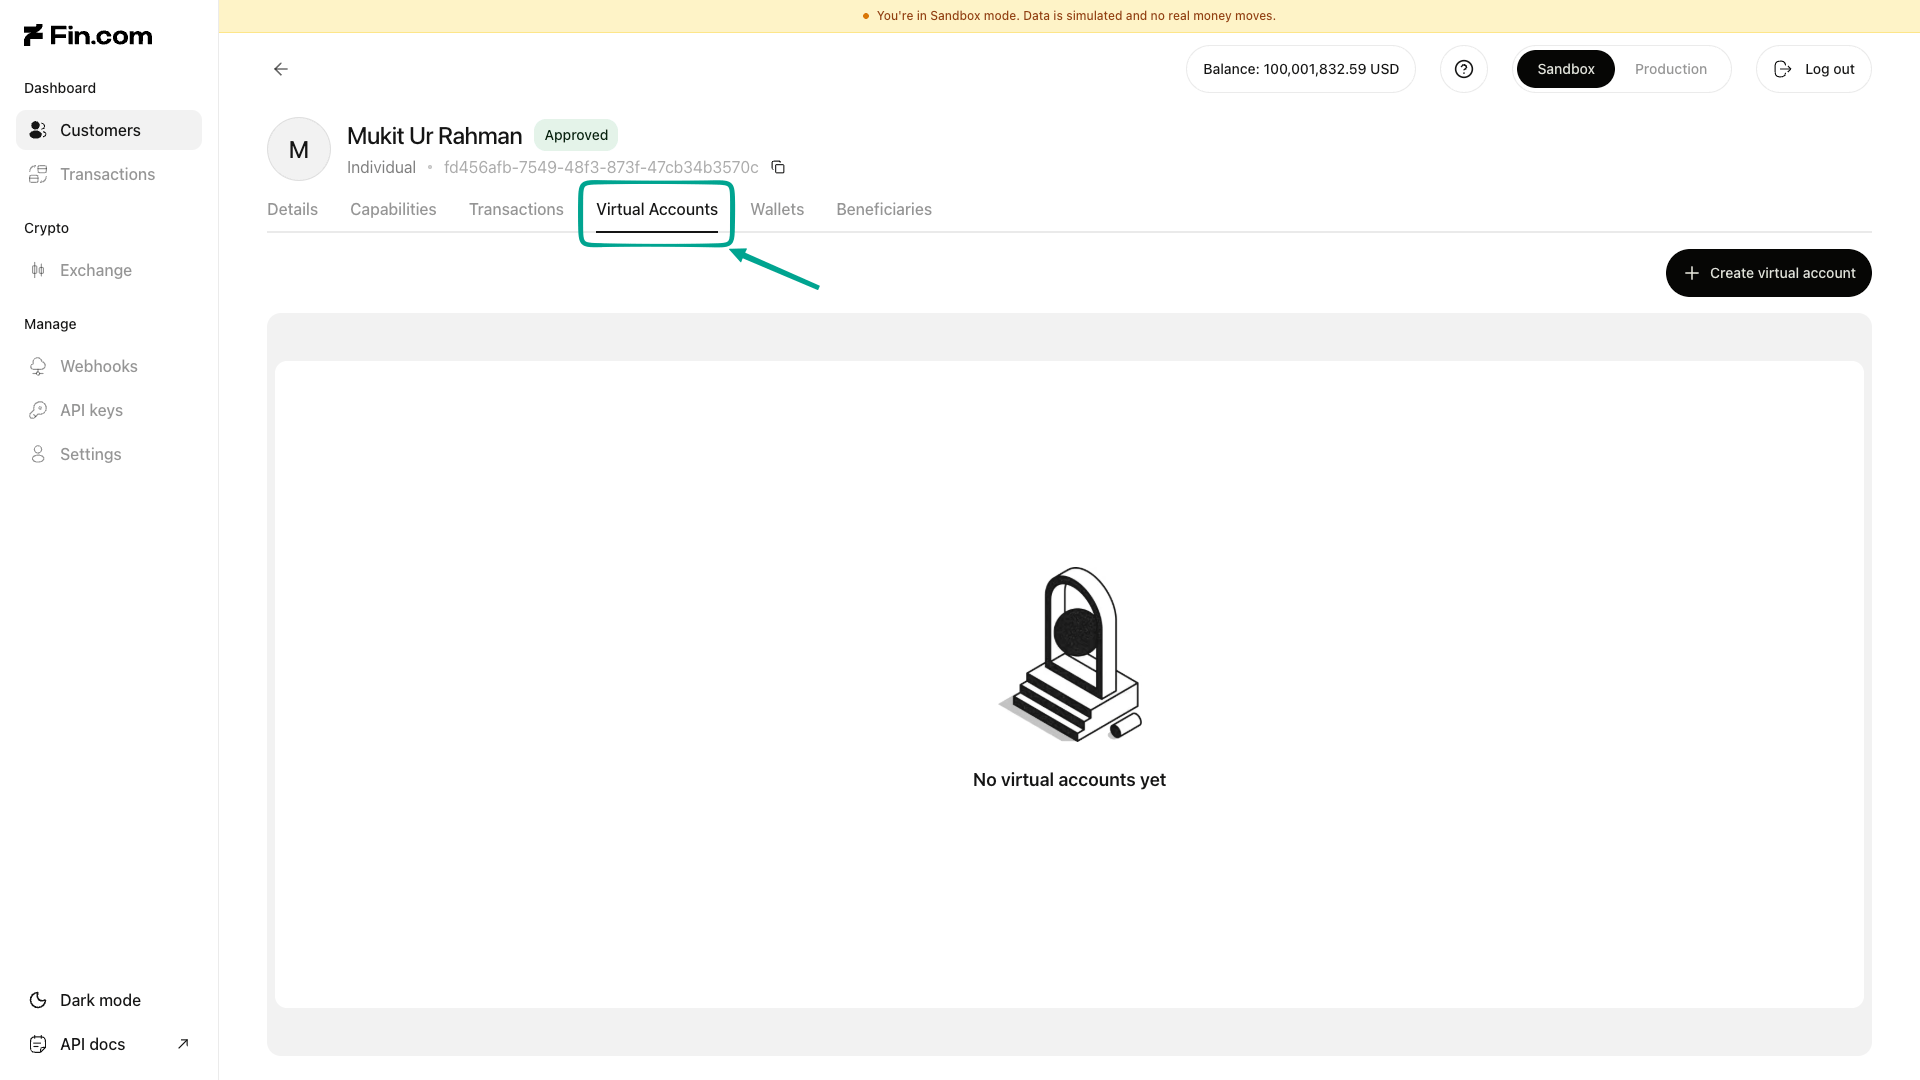
Go to **Customer details** for the customer you want the account for, then open the **Virtual Accounts** tab.
Not sure whether a customer is eligible? Contact us in your dedicated Slack channel and we will confirm.
## How do I create the virtual account?
Go to **Customer details** for the customer you want the account for, then open the **Virtual Accounts** tab.
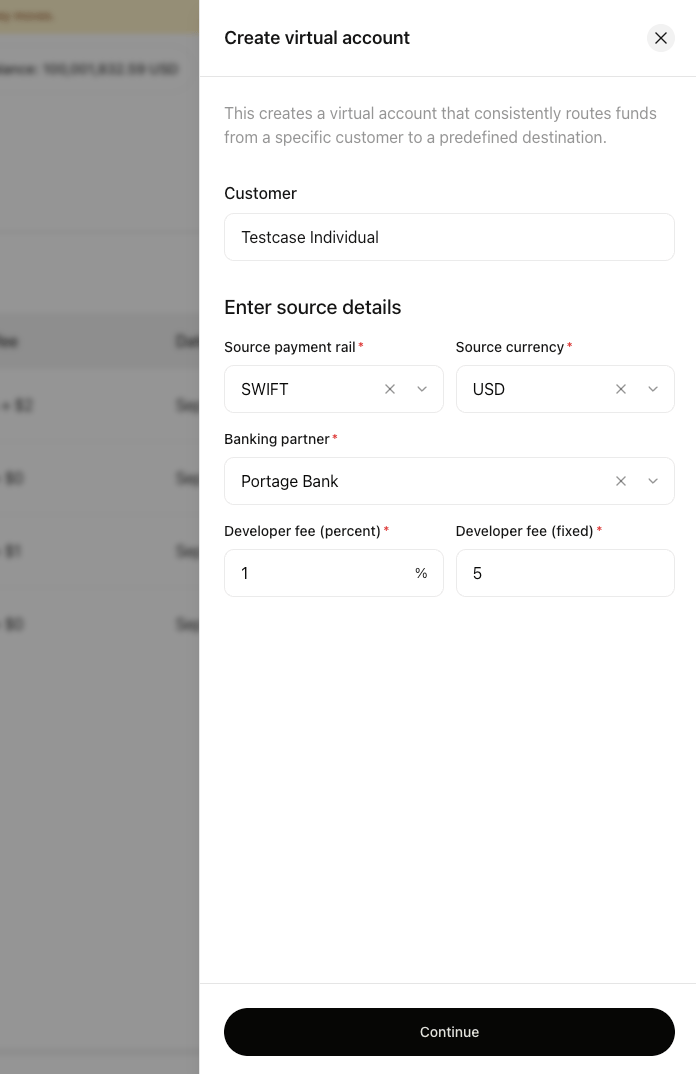
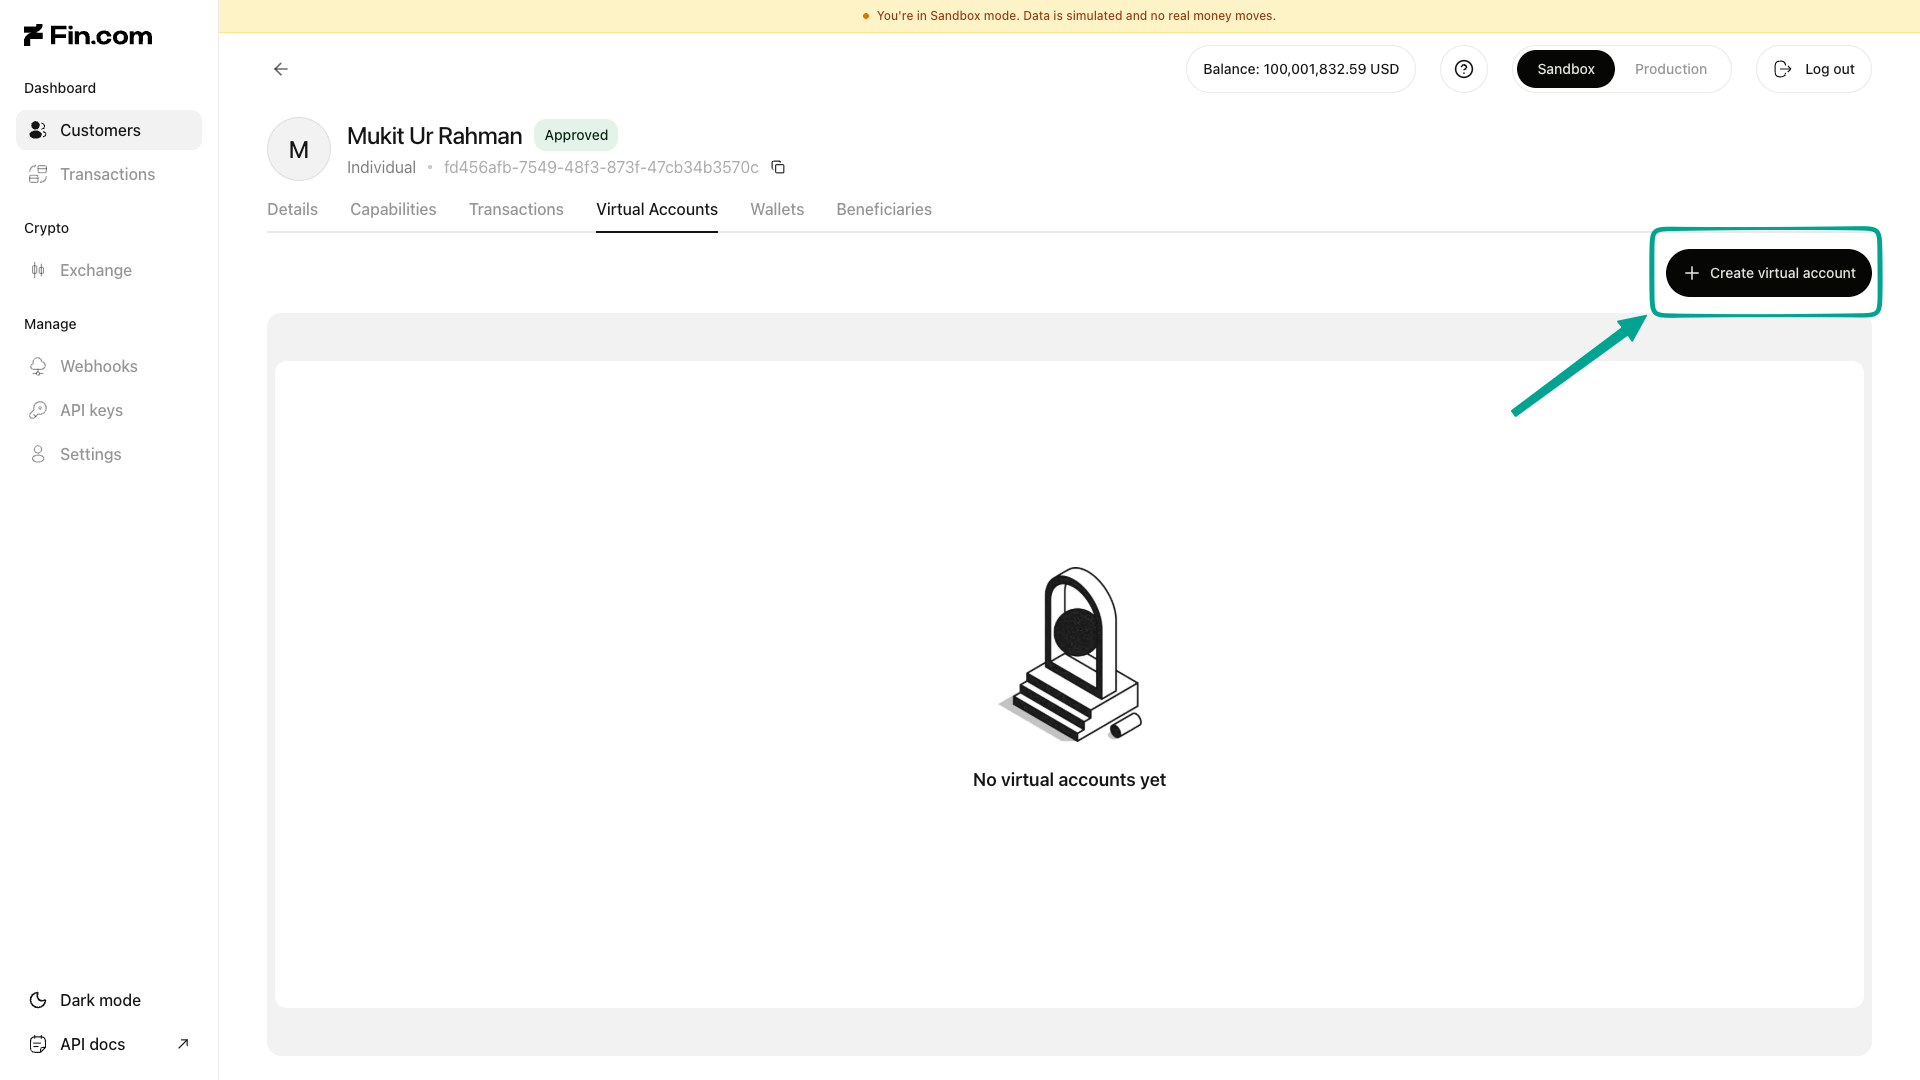 This is the fiat side of the account, meaning the bank details your customer will hand out.
* **Source payment rail** is the payment network the money arrives on, such as SWIFT, ACH, or Fedwire.
* **Currency** is the currency the account receives.
* **Banking partner** is the bank that issues the account and takes in the payment. The partners you can pick from depend on how your account is set up, and not every partner supports every rail.
* **Developer fees** are the fees you charge on top of each deposit. You can set a fixed amount, a percentage, or both.
This is the fiat side of the account, meaning the bank details your customer will hand out.
* **Source payment rail** is the payment network the money arrives on, such as SWIFT, ACH, or Fedwire.
* **Currency** is the currency the account receives.
* **Banking partner** is the bank that issues the account and takes in the payment. The partners you can pick from depend on how your account is set up, and not every partner supports every rail.
* **Developer fees** are the fees you charge on top of each deposit. You can set a fixed amount, a percentage, or both.
 This is the crypto side of the account. Pick the **destination blockchain**, the **currency** you want to receive, and the **wallet address** the settled funds should go to.
Double-check the wallet address before you continue. Funds sent to a wrong address cannot be recovered.
This is the crypto side of the account. Pick the **destination blockchain**, the **currency** you want to receive, and the **wallet address** the settled funds should go to.
Double-check the wallet address before you continue. Funds sent to a wrong address cannot be recovered.
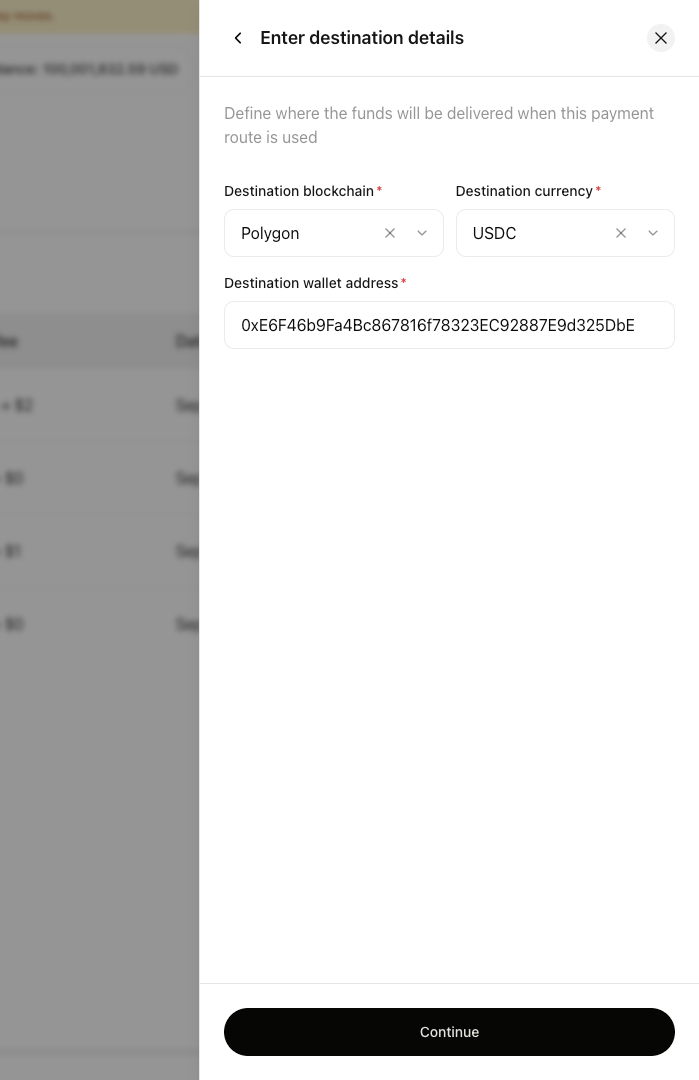 Select **Continue** to submit the request.
New accounts are reviewed before they open. Come back to the **Virtual Accounts** tab and check the **Status** column to follow progress.
Select **Continue** to submit the request.
New accounts are reviewed before they open. Come back to the **Virtual Accounts** tab and check the **Status** column to follow progress.
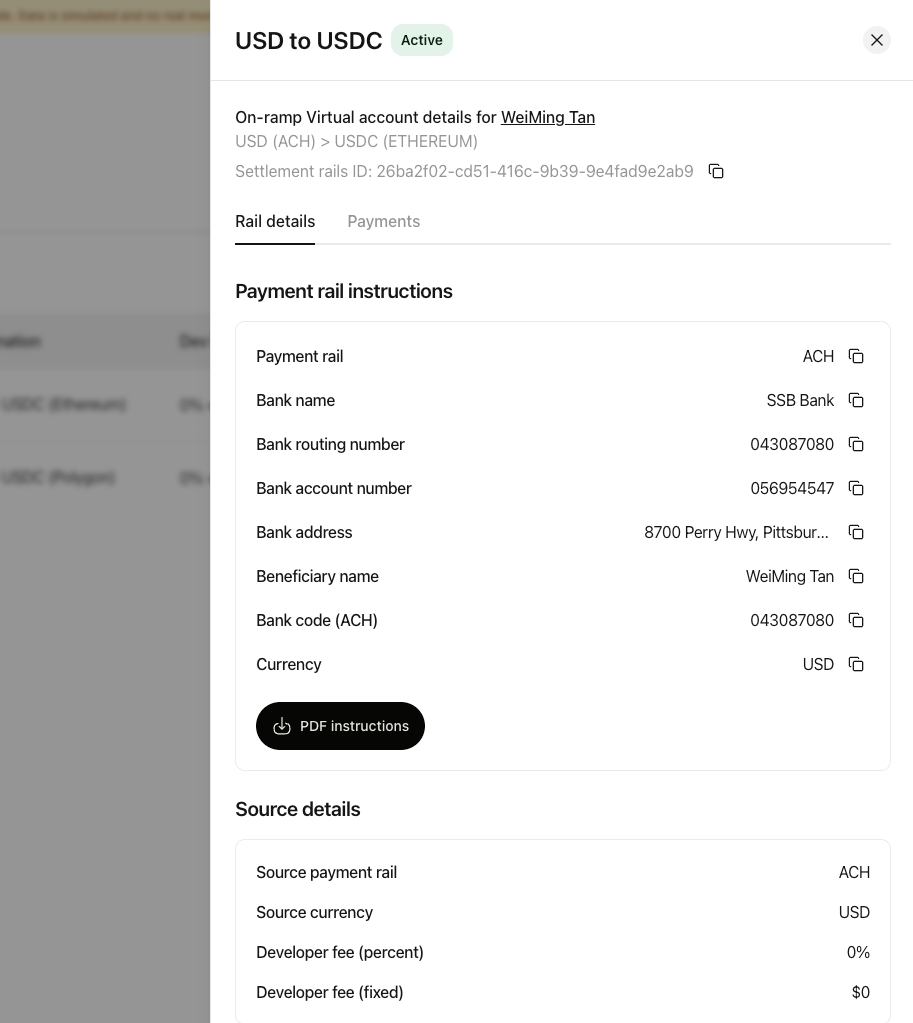
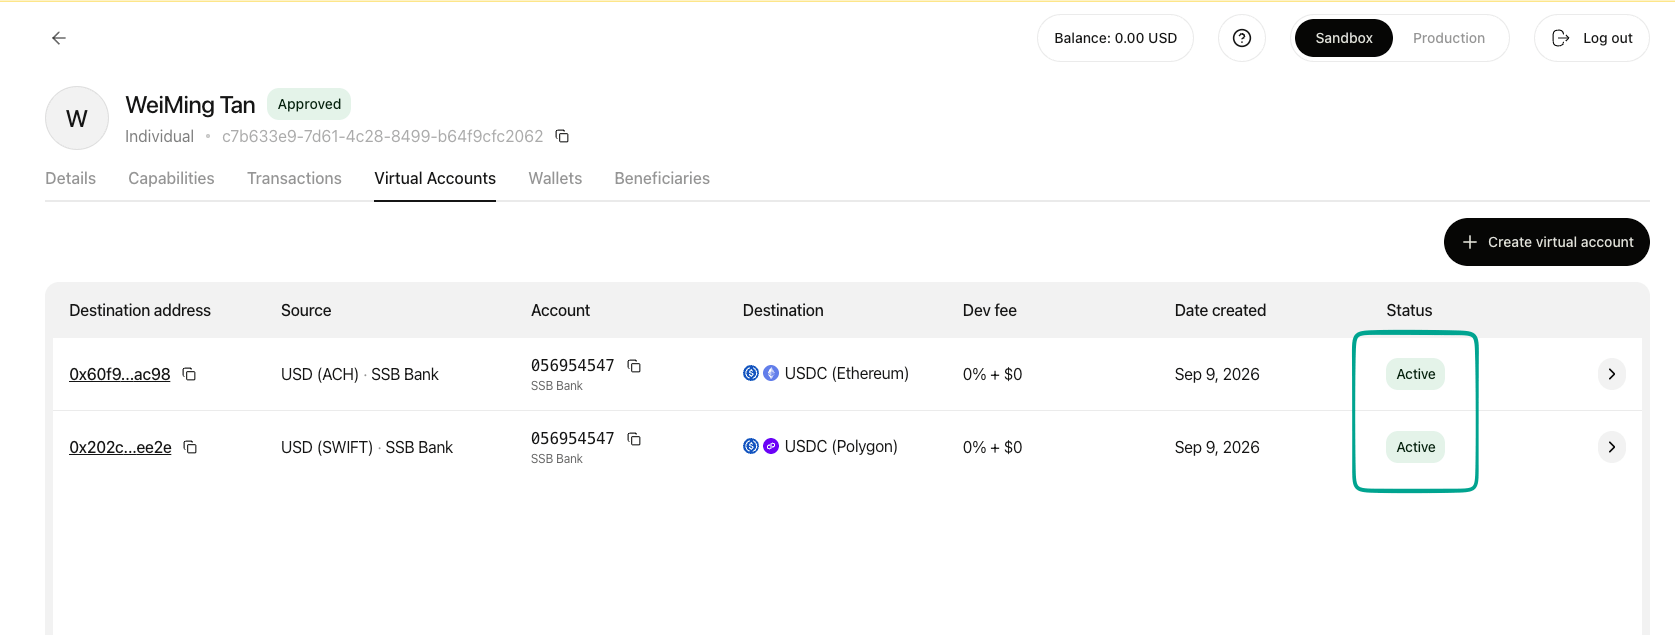 Once the status shows **Active**, the account is ready. Open it to see the bank details your customer can be paid into, under **Payment rail instructions**. Each field has a copy button beside it, and **PDF instructions** downloads the whole set as a document.
 A customer can hold only one virtual account per currency and payment rail.
## How do I receive the first deposit?
Send the deposit details to whoever is paying in. From the account you can either copy the details directly or download them as a PDF instruction sheet to forward on.
Share every field exactly as shown. A payment sent with incomplete details may be delayed or returned.
Once the payment has been made, it appears in the **Transactions** tab. Payments are not instant, and how long they take depends on the rail the sender used.
A customer can hold only one virtual account per currency and payment rail.
## How do I receive the first deposit?
Send the deposit details to whoever is paying in. From the account you can either copy the details directly or download them as a PDF instruction sheet to forward on.
Share every field exactly as shown. A payment sent with incomplete details may be delayed or returned.
Once the payment has been made, it appears in the **Transactions** tab. Payments are not instant, and how long they take depends on the rail the sender used.
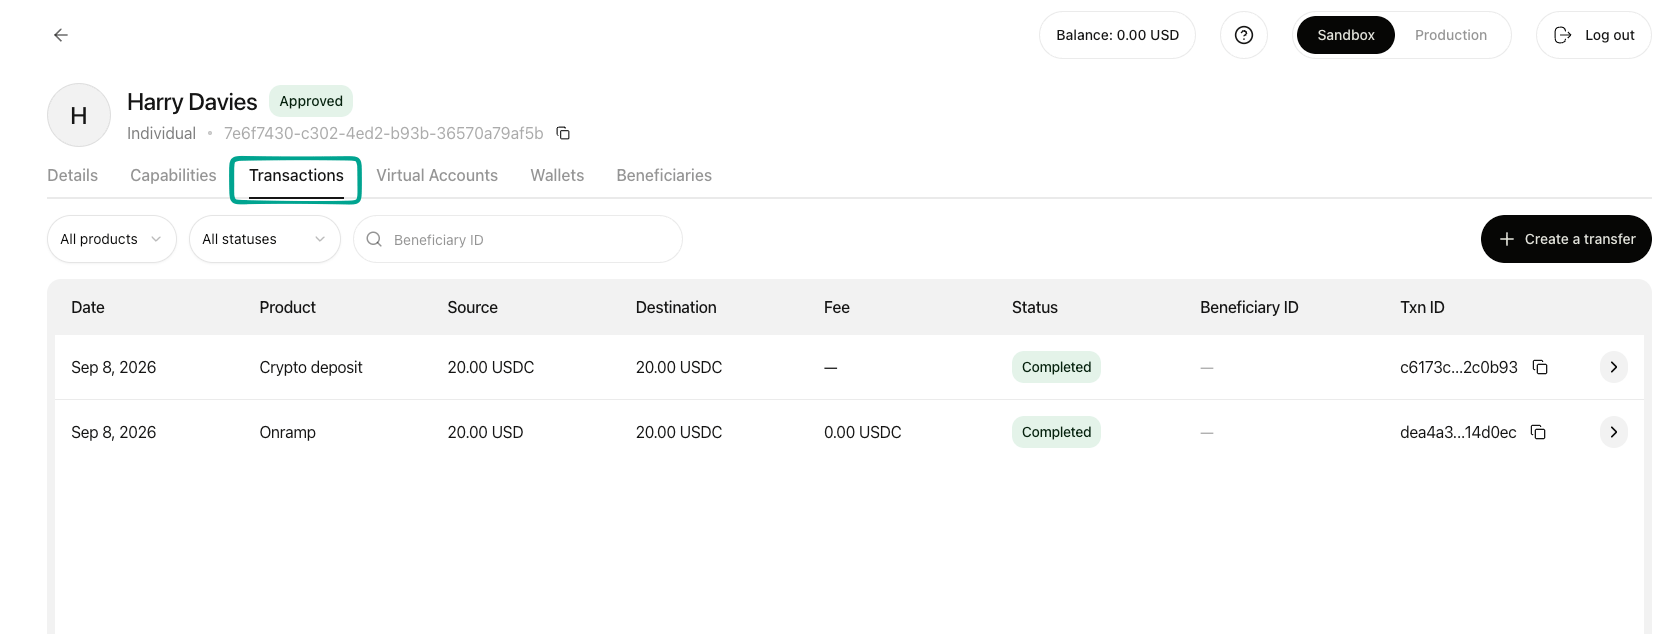 When the deposit completes, the amount received is converted and settled to the destination address you set when you created the account. The transaction record shows both sides, so you can see what arrived as fiat and what settled as crypto.
## Do I have to do this for every customer?
Yes. A virtual account is tied to one customer, so each customer needs their own. Once an account is active it stays available, so you only go through this once per customer, per currency and rail.
**Need a hand with your first account?**
Contact us in your dedicated Slack channel and we will walk through it with you.
When the deposit completes, the amount received is converted and settled to the destination address you set when you created the account. The transaction record shows both sides, so you can see what arrived as fiat and what settled as crypto.
## Do I have to do this for every customer?
Yes. A virtual account is tied to one customer, so each customer needs their own. Once an account is active it stays available, so you only go through this once per customer, per currency and rail.
**Need a hand with your first account?**
Contact us in your dedicated Slack channel and we will walk through it with you.